Day 1
Hello fellow woodworkers!!
We were all a little nervous due to the fact that this was the first Perch Stool Course. None of us were 100% sure how the class would pan out. There were lots of crossing of fingers.
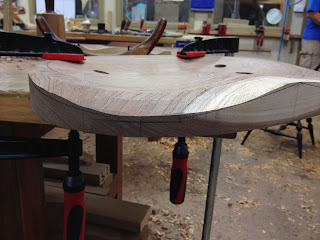
After a quick introduction, I split the class into two. One half went to the machine room to turn their legs, while the other half stayed in the classroom to mark out and carve their seats. All went very well and to plan except that we discovered that there is a lot more to the carving compared to the turning. Some of the carvers finished late in the day.
Above: Bern is marking out a seat.
Above: Hugh is reaming his seat with a 6 degree reamer. This is in preparation for the tapered tenons on top of the legs.
Above: Alastair is preparing the laser jig. This jig enables us to set the lasers at the correct angles quickly. You can see the lasers in the photo above with Hugh. The lasers help keep the reamer at the correct angle.
Above: Jeff ( our favourite American!) is turning his legs.
DAY 2
Day 2 was exactly the same as the previous day except that the groups had reversed roles. Bern and I also had an opportunity to develop an easier carving regime for the seat which we are now very happy with. The new regime is much simpler and easy to follow.
Above: Gabriele is reaming her seat. Again, you can see the lasers and the laser line on her hands.
DAY 3
Day 3 was 'D DAY!'. We wanted to have the stretchers cut to length, the mortices for the stretchers drilled, the wedges for the tops of the legs prepared and the stool glued up by lunch time. A little ambitions...yes! We ended up glueing them by about 3pm ish. The Perch Stools all came together beautifully!
Above: Hugh and Andrew working on their stools with Peter Galbert's original Perch Stool in the foreground.
Above: Myself conducting a demonstration on how to mark out for the stretchers.
Above: Same as above.
Above left: Jeff getting ready to glue up his stool. The pressure is building! You can see the glue pot to the left. We are using hide glue which is the best for these circumstances. Not so common these days.
Above right: Jeff widening the cuts in the top of the legs to accept the wedges.
Above: Jeff hammering the wedges into his stool.
Above: All the stools completed and everybody HAPPY!!
From left to right: Alastair, Hugh, Andrew, Jeff, Gabriele, Shinobu, Doug and our website genius - Tom! Paul, Callan and Bern left early.
Thank you everyone for attending!!


No comments:
Post a Comment